I've been extremely busy of late, trying to come up with all sorts of ways to do scenery for wargames. I've tried to come up with both different styles, and keep the intent of the terrain in mind all the while.
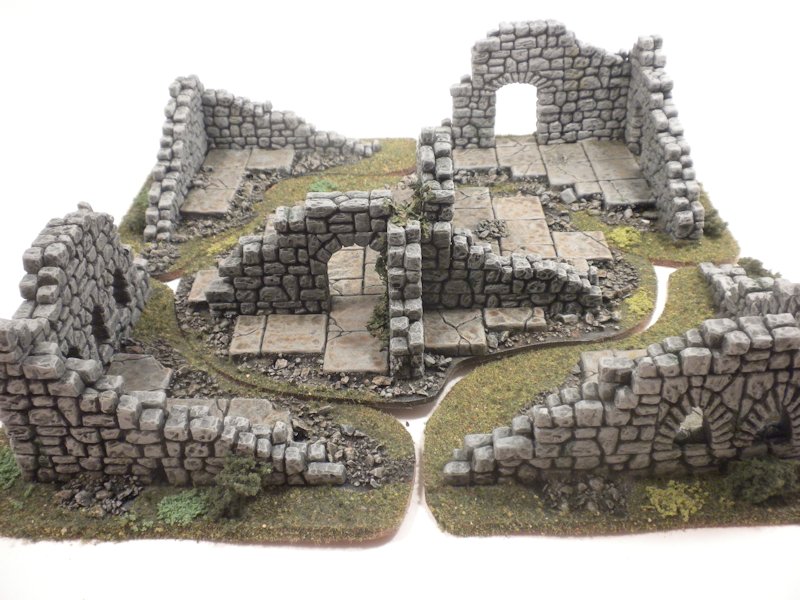
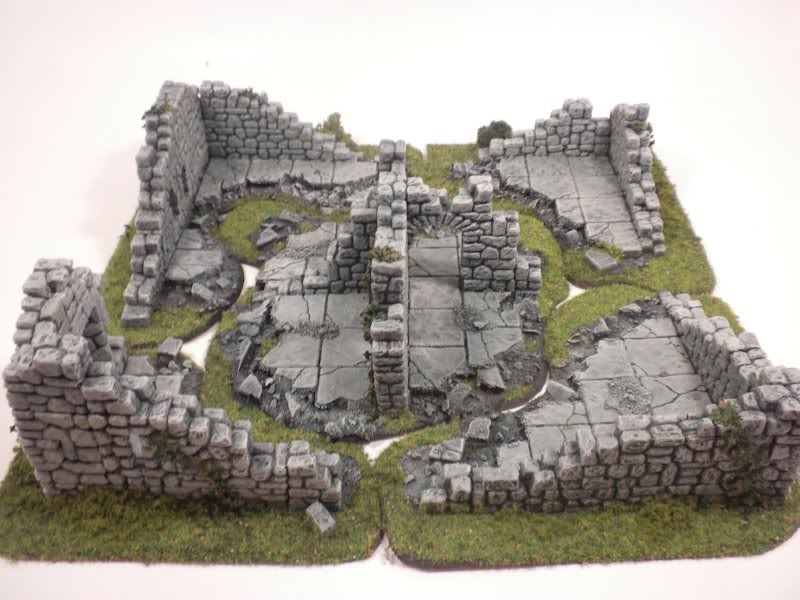
A note about the concept behind my designs. I try to strike a balance between realism and playability. That means my hills will, in most part, be terraced to allow for maximum amount of miniature placement. My ruined buildings will not be awash with the correct amount of debri one would normally see in the case of a collapsed building. Again, to allow for the easy placement and subsequent standing of said miniatures.
Having spelled that out, I hope to see my terrain evolve over time, and become better, more durable, and of higher quality than the majority of terrain you might see offered around the web. There are some great sites out there selling wargame terrain, believe me, I've pored over them for years now. The best of them have learned and adapted their techniques to create better scenery, and I hope to do the same. I'm not going to claim to be the best, as there are more established terrain studios who have access to the experience and tools the time as professional terrain creators do. All I can do is strive to achieve what they have.
Here's a bit about myself. I'm an early thirties old school gamer who has been playing wargames, rpgs, and video games since an early age. I believe I was introduced to Warhammer when I was 12 by a fellow Air Force brat who happened to be English. I was blown away by the hobby, and quickly started collecting armies. This led into the "gateway games" like AD&D, Epic, and countless other boardgames.
But what to play on? Since I and my friends gathered most often at my house, I decided to make some terrain. My earliest works were expanded polystyrene packing styrofoam sheets melted with a spray can. I advanced onto painting them with acrylics, trying to make natural hills, city ruins, using foamcore board, using Hirst Arts blocks etc etc. And now I've been doing it for close to 20 years now.
But I've never really looked at terrain as a business. Not until recently when I found myself with a lot of time on my hands due to medical reasons. So here I am!
My focus, for the moment, is on 28mm wargames. I can make for both sci-fi and fantasy. I believe my terrain is fairly durable if taken care of, but it isn't made of resin. Plaster can break, and flock can be scraped off. But it should hold up for years of wargaming on your table.
But, is it "professional"? I see that word thrown around a lot. I see it used when appropriate, but then again, I see it used when detailing what amounts to a brick glued to a board with some green flock sprinkled on it. So I won't use it. I'll let you, the owner and future owners of my hand-made scenery, to be the judge of that.
I've recently finished some commissions I took after placing items on Ebay, so I am open for new orders. I'm not set up for whole boards at the moment, but am planning on experimenting with them. For now I'm keeping it to individual pieces, or sets to fill an entire table!
Thanks for reading, and be sure to check the blog often, as I'll be updating it frequently!


